800-891-8312
FREE SHIPPING* Most orders over $500 qualify. Free shipping applies to Barn Door Hardware, Barn Doors, and Pocket Doors over $500. Front doors, interior doors, shower doors, any oversized door (wider than 3ft and taller than 7ft) and any special order doors have shipping costs which are calculated at checkout. Some barn door hardware track lengths do not qualify for free shipping.


How to Install a Bypass Barn Door and Hardware
Saturday, September 15th, 2018
Share
Bypass your way to saving more space
Have you been thinking that a sliding barn door would be an awesome addition to your home’s style?
You’re right. Absolutely right.
But maybe you’ve also been thinking that you don’t have the wall space to the side of the door for them to slide back and forth.
You’re wrong.
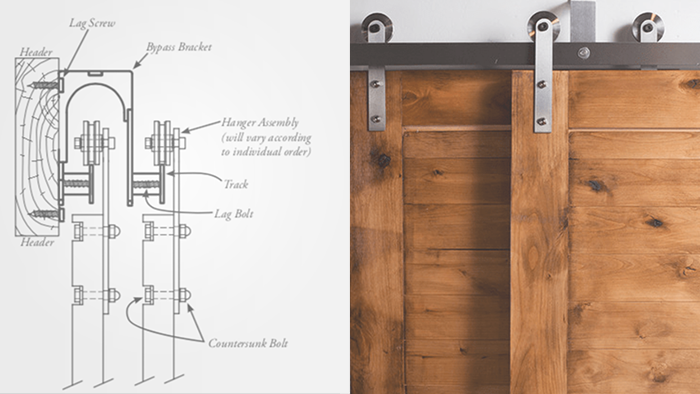
Introducing bypass barn doors. Bypass brackets allow your doors to slide in front of and behind each other as double sliding doors. That’s right: the stylish and space-saving sliding barn door just got even more space-saving with bypass brackets. And better yet, you can install them yourself!
Don’t worry, installing bypass barn doors aren’t much more complicated than installing a traditional sliding door. So, let’s get your next home improvement project started with these quick DIY bypass barn door hardware steps. You’ll be enjoying your beautiful new bypass door in no time!

Step 1: Measure and cut your header board
Using your level, measure 2” above the door opening to locate the wall studs and secure your header board. In the case of bypass sliding doors, you probably want your opening to be, at minimum, the width of the door opening. Go ahead and mount the header board with #8 trim screws in each stud location.
Step 2: Install bypass bracket
After the header board has been secured, level and attach the bypass brackets using lag bolts and flat washers. Align the center rail and mark the mounting holes (typically 4) of the bracket and drill pilot holes using ¼” drill bit for the lag bolts.
Next, you’ll want to mount a bracket onto the other end of the rail and mount the rail/bracket assembly to the bracket you just installed. Find a partner because you’re going to need another hand for this to be sure it’s level. Mark the location of the mounting bracket holes, use your drill to add some 1/8” pilot holes and mount the remaining brackets.

Step 3: Dooring install
Follow the template instructions for your door hardware and drill your pilot holes with a 1/8” drill bit. Slide the bolt through the hole and mount the rolling hardware before drilling the bottom hole. You’ll then repeat this for the other side.
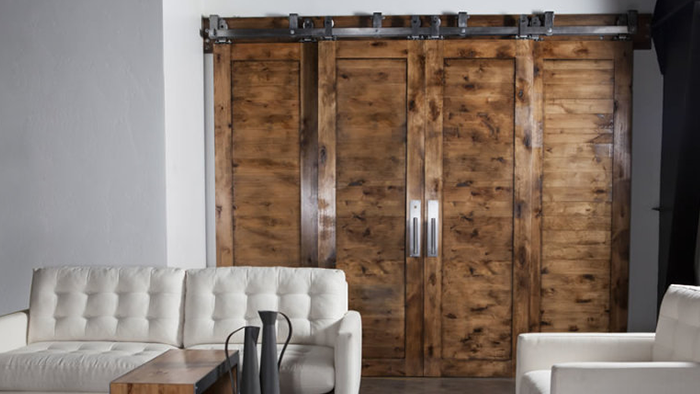
Once your doors are installed and hung, you can find peace of mind that the quality hardware will hold and the doors will slide and glide smoothly. Oh yeah, and it doesn’t hurt that they look really, really good, too. Looking for a Bypass or Bi Parting Barn Door Hardware? Find both on our site!


Rustica Shop & HQ 1060 Spring Creek PlaceSpringville Utah 84663Customer Service & Sales(800)-891-8312


Hitching Post
Event Venue
1520 N Main Street
Springville UT 84663

PRODUCTS
FEATURES
COMPANY
BUSINESS